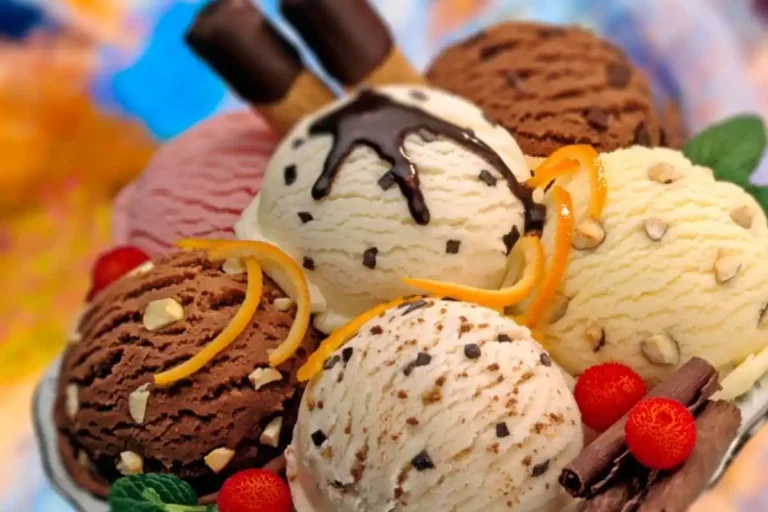
Explore the world of Ninja Creami with our in-depth guide on Ninja Creami recipes, where we cover everything from setup to advanced recipe creation. Whether you’re looking to whip up classic vanilla ice cream or experiment with gourmet chocolate hazelnut gelato, this guide has everything you need to master your Ninja Creami and expand your dessert repertoire.
Table of Contents
- Introduction
- Understanding Your Ninja Creami
- Basic Ninja Creami Recipes
- Creative Recipes with Your Ninja Creami
- Advanced Techniques for Ninja Creami Recipes
- Troubleshooting Common Ninja Creami Issues
- Expanding Your Dessert Menu
- Conclusion
- FAQ
Introduction
The Ninja Creami has revolutionized the way we think about homemade desserts. It’s not just an ice cream maker; it’s a versatile kitchen tool that allows you to create a plethora of frozen treats from ice cream to sorbets, all with a texture and flavor that can rival professional outcomes. This appliance is a favorite among dessert enthusiasts for its ability to produce consistently smooth and creamy results with minimal effort.
In this blog post, we’ll dive deep into the capabilities of the Ninja Creami, offering both basic and advanced recipes, and providing tips and tricks to help you get the most out of your device. Whether you’re a novice just beginning your culinary journey or a seasoned chef looking to expand your dessert menu, this guide is tailored to inspire and enhance your cooking experience.
Understanding Your Ninja Creami
Key Features and Functions
The Ninja Creami stands out in the market due to its innovative features designed to simplify the process of making frozen desserts. Here’s a closer look at what makes this appliance a must-have:
- Creamify Technology: At the heart of the Ninja Creami is its Creamify technology, which utilizes a unique process of freezing and blending ingredients to achieve a smooth and creamy texture without the need for professional culinary skills.
- Multiple Presets: The device comes equipped with several preset functions such as ice cream, gelato, sorbet, and even dairy-free options, making it versatile for various dietary preferences.
- Re-spin Function: If the texture isn’t to your liking on the first try, the re-spin function allows you to blend it again for improved smoothness.
This blend of features not only enhances the functionality of the Ninja Creami but also empowers you to experiment with different recipes and ingredients, pushing the boundaries of traditional homemade desserts.
Setting Up Your Ninja Creami for the First Time
Setting up your Ninja Creami is straightforward, ensuring you can start creating delicious desserts right away. Here’s how to get started:
- Unpack and Assemble: Carefully remove all parts of the Ninja Creami from the packaging. Assemble according to the manufacturer’s instructions, ensuring all components are securely fastened.
- Initial Cleaning: Before the first use, wash all removable parts with warm, soapy water. This not only ensures hygiene but also helps in removing any residues from the manufacturing process.
- First Test Run: It’s a good idea to run a test cycle with just water or use a simple recipe to familiarize yourself with the functions. This step ensures everything is working correctly and gives you a feel for the machine’s operation without wasting ingredients.
By following these steps, you set the stage for a seamless and enjoyable dessert-making experience. Proper setup and understanding of your machine are crucial in maximizing its potential and longevity.
Basic Ninja Creami Recipes
The Classic Vanilla Ice Cream Recipe
Vanilla ice cream is a timeless favorite and a great starting point for anyone new to using the Ninja Creami. Here’s how to make a creamy, rich vanilla ice cream that serves as a perfect base for countless variations:
Ingredients:
- 2 cups heavy cream
- 1 cup whole milk
- 3/4 cup granulated sugar
- 1 tablespoon pure vanilla extract
Instructions:
- Mix Ingredients: Combine the milk, cream, sugar, and vanilla extract in a bowl. Whisk until the sugar is completely dissolved.
- Chill: Pour the mixture into an ice cream pint container and freeze until solid, preferably overnight.
- Process in Ninja Creami: Insert the frozen base into the Ninja Creami. Select the ‘Ice Cream’ preset and start the machine. Once the cycle is complete, check the consistency. If needed, use the re-spin function for a smoother texture.
- Serve or Store: Serve immediately for a soft-serve consistency or transfer to an airtight container and freeze for a few hours for a firmer texture.
This basic recipe not only delivers a delicious outcome but also teaches the fundamental process of ice cream making with the Ninja Creami, setting you up for more complex recipes.
Refreshing Fruit Sorbet Variations
Sorbets are a fantastic option for a lighter, fruitier treat, especially during warmer weather. Here’s how to use your Ninja Creami to create vibrant and refreshing fruit sorbets:
Recipes:
- Berry Sorbet
- Ingredients: 2 cups mixed berries (strawberries, blueberries, raspberries), 1/2 cup sugar, 1/2 cup water
- Preparation: Simmer berries, sugar, and water in a saucepan until the sugar dissolves and berries soften. Blend the mixture until smooth and strain. Freeze in a Ninja Creami pint container.
- Process: Once frozen, process in the Ninja Creami using the ‘Sorbet’ preset.
- Mango Sorbet
- Ingredients: 2 cups ripe mango chunks, 1/2 cup sugar, 1/2 cup water, juice of 1 lime
- Preparation: Blend mango, sugar, water, and lime juice until smooth. Freeze in a Ninja Creami pint container.
- Process: Follow the same steps as the berry sorbet.
- Lemon Sorbet
- Ingredients: 1 cup fresh lemon juice, 1 cup water, 3/4 cup sugar
- Preparation: Dissolve sugar in water on the stove. Add lemon juice. Chill and then freeze in a Ninja Creami pint container.
- Process: Use the Ninja Creami to process as above.
These recipes showcase the versatility of the Ninja Creami and offer a delightful array of flavors that are sure to impress anyone looking for a cool, refreshing dessert.
Creative Recipes with Your Ninja Creami
Gourmet Chocolate Hazelnut Gelato
For those with a penchant for rich, decadent desserts, this chocolate hazelnut gelato is a game-changer. Using the Ninja Creami, you can achieve a professional gelato texture that’s dense yet creamy, perfectly capturing the essence of this Italian specialty.
Ingredients:
- 2 cups whole milk
- 1 cup heavy cream
- 3/4 cup sugar
- 1/2 cup cocoa powder
- 1/2 cup hazelnut spread
- 1 teaspoon vanilla extract
Instructions:
- Prepare the Base: In a saucepan, combine milk, cream, sugar, and cocoa powder. Heat over medium until the sugar and cocoa dissolve completely. Remove from heat.
- Add Flavors: Stir in the hazelnut spread and vanilla extract until the mixture is smooth.
- Chill and Freeze: Pour the mixture into a pint container and freeze until solid.
- Process in Ninja Creami: Once frozen, process the mixture using the ‘Gelato’ setting on your Ninja Creami to ensure a dense, creamy texture.
- Serve or Store: Enjoy immediately for a soft texture or freeze for a few hours for a more traditional gelato firmness.
This recipe not only adds a luxurious variety to your dessert menu but also demonstrates the Ninja Creami’s ability to handle more complex, rich flavors.
Vegan and Dairy-Free Options
Expanding your dessert repertoire to include vegan and dairy-free options is straightforward with the Ninja Creami. Here are two recipes that cater to those dietary preferences while still delivering on taste and texture.
- Coconut Milk-Based Ice Cream
- Ingredients: 2 cups full-fat coconut milk, 3/4 cup sugar, 1 teaspoon vanilla extract
- Preparation: Whisk together all ingredients until sugar dissolves. Freeze in a Ninja Creami pint container.
- Process: Use the ‘Ice Cream‘ preset on the Ninja Creami for a creamy, vegan-friendly dessert.
- Almond Milk Sorbet
- Ingredients: 2 cups almond milk, 1/2 cup sugar, 2 teaspoons almond extract
- Preparation: Dissolve sugar in almond milk, add almond extract, and chill. Freeze in a Ninja Creami pint container.
- Process: Process using the ‘Sorbet’ preset to achieve a light and refreshing finish.
These vegan and dairy-free recipes ensure that everyone can enjoy delicious homemade desserts regardless of dietary restrictions, showcasing the Ninja Creami’s versatility.
Advanced Techniques for Ninja Creami Recipes
Mixing Flavors Like a Pro
One of the joys of using the Ninja Creami is the ability to get creative with flavors, mixing and matching to create unique combinations that can become your signature desserts. Here’s how to experiment effectively:
- Start with a Base: Choose a basic ice cream, sorbet, or gelato recipe as your foundation.
- Experiment with Add-Ins: Think about flavors that complement each other. For instance, coffee and caramel, chocolate and orange, or raspberry and white chocolate.
- Test in Small Batches: Before committing to a full pint, try small amounts to see how the flavors meld during the freezing and creaming processes.
- Balance Sweet and Savory: Don’t be afraid to incorporate non-traditional ingredients like herbs (basil or mint) or spices (cinnamon or nutmeg).
A case study to illustrate this is the creation of a “Mocha Swirl Ice Cream” where espresso and chocolate were combined. The process involved adding brewed espresso to a chocolate ice cream base and swirling in melted chocolate before the final freeze, resulting in a dessert that appealed to coffee and chocolate lovers alike.
Utilizing Add-Ins and Toppings
Add-ins and toppings can transform a simple ice cream into a gourmet treat. Here’s how to integrate them using the Ninja Creami:
- Choose Compatible Add-Ins: Select ingredients that complement the base flavor and will maintain their texture after freezing. Examples include nuts, chopped fruits, or cookie pieces.
- When to Add: Introduce most add-ins during the final minutes of the Ninja Creami cycle to maintain their integrity and distribution.
- Consider Toppings for Serving: Toppings like sauces, whipped cream, or fresh fruits add visual appeal and layers of flavor. Serve these on the side or drizzle over the dessert just before serving.
For example, creating a “Rocky Road Ice Cream” involves processing a chocolate ice cream base first, then adding almonds and marshmallows towards the end of the cycle to ensure they’re evenly distributed but not broken down.
These advanced techniques not only enhance the flavor and texture of your desserts but also provide a canvas for your culinary creativity, making each Ninja Creami creation uniquely yours.
Troubleshooting Common Ninja Creami Issues
Solutions to Common Recipe Failures
Even with the most advanced kitchen gadgets like the Ninja Creami, things might not always go as planned. Here are some common issues and how to solve them:
- Issue: Ice Cream is Too Hard
- Solution: If your ice cream comes out too hard, it may be due to too little fat or sugar in the recipe. Consider adjusting the recipe to include more of these ingredients, or allow the dessert to sit at room temperature for a few minutes before serving.
- Issue: Sorbet is Too Icy
- Solution: Sorbets become icy if they have too much water and not enough sugar. Increase the sugar content, or add a small amount of alcohol (like vodka) to the mix to lower the freezing point and improve texture.
- Issue: Flavors Are Too Mild
- Solution: Flavors tend to dull in frozen desserts. Enhance the flavor intensity by adding more of the flavoring elements or using concentrated forms, such as extracts or pastes.
- Issue: Mix-Ins are Sinking
- Solution: If add-ins like fruits or nuts sink to the bottom or aren’t well distributed, add them during the last few minutes of the processing cycle. This helps keep them evenly distributed throughout the dessert.
Maintenance Tips to Keep Your Ninja Creami in Top Shape
Regular maintenance ensures your Ninja Creami continues to perform well. Here’s how to keep it in top condition:
- Clean After Each Use: Always clean your Ninja Creami parts immediately after use to prevent buildup and potential damage. Follow the manufacturer’s guidelines for which parts are dishwasher safe.
- Regularly Inspect Seals and Blades: Check the seals and blades periodically for wear and tear. Replace them if they show signs of deterioration to ensure your machine functions properly.
- Deep Cleaning: Once a month, perform a deep clean of all components. Use a soft brush and a baking soda paste to clean tough areas, followed by a thorough rinse.
Properly addressing these common issues and maintaining your device will extend the lifespan of your Ninja Creami and ensure it remains a valuable asset in your kitchen for creating delicious, homemade desserts.
Expanding Your Dessert Menu
Beyond Ice Cream – Exploring Other Desserts
The Ninja Creami isn’t just for ice cream—it’s a versatile tool that can help you explore a wide range of frozen desserts. Here are some creative ideas to expand your dessert menu:
- Frozen Yogurt: Use Greek or regular yogurt mixed with honey or fruit purees to create tangy frozen yogurts. This option is healthier but still provides a creamy texture akin to soft-serve ice cream.
- Slushies: Perfect for hot days, slushies can be made by processing fruit juices or flavored syrups with ice in your Ninja Creami. Add fresh fruit slices for an extra refreshing treat.
- Frozen Cocktails: While avoiding the use of alcoholic beverages, you can still prepare virgin versions of popular frozen cocktails like piña coladas or strawberry daiquiris using fruit juices and ice.
These recipes not only diversify the types of desserts you can offer but also cater to various preferences and dietary needs, making your Ninja Creami an indispensable part of your kitchen arsenal.
Conclusion
The Ninja Creami is truly a revolutionary tool in the world of home dessert creation. With its versatile capabilities, you can go beyond traditional ice cream and explore a vast array of frozen treats. From silky gelatos and vibrant sorbets to inventive slushies and frozen yogurts, the possibilities are endless.
Embrace the full potential of your Ninja Creami by experimenting with different recipes and flavors. Each creation not only adds to your culinary repertoire but also brings joy and satisfaction to your dining table. The Ninja Creami isn’t just a kitchen appliance; it’s a gateway to exploring your creativity and sharing delightful moments with family and friends.
Frequently Asked Questions (FAQs)
What else can you do with a Ninja Creami?
Beyond making ice cream, the Ninja Creami offers versatility that extends to several other delightful frozen treats. You can make frozen yogurt, sorbets, slushies, and even non-alcoholic frozen cocktails. Its ability to puree frozen ingredients also allows for innovative desserts like frozen pies or cheesecakes, blending frozen bases with a variety of mix-ins.
Do you really have to wait 24 hours for Ninja Creami?
For optimal results, it is generally recommended to freeze your base mixture for at least 24 hours before processing it in the Ninja Creami. This ensures that the mixture is fully frozen, which is crucial for achieving the smooth, creamy texture the Creami is known for. However, some recipes or pre-chilled ingredients might require less freezing time, so it’s good to experiment based on the specific instructions of each recipe.
Do you really need a Ninja Creami?
While not a necessity, owning a Ninja Creami can significantly enhance your ability to create professional-quality frozen desserts at home with ease. Its specialized functions and features offer a level of convenience and texture control that traditional methods or other appliances might not provide. If you enjoy homemade frozen desserts and value the ability to customize flavors and ingredients, a Ninja Creami could be a worthwhile investment.
Is it possible to simply add frozen fruit to the Ninja Creami?
Yes, you can put frozen fruit directly into the Ninja Creami, but for best results, it’s recommended to use it as part of a recipe that includes some liquid and a sweetener. This helps in achieving a smoother consistency and balanced flavor. The Ninja Creami is designed to handle frozen ingredients and blend them into creamy sorbets or smoothies, making it ideal for creating fruit-based frozen treats.
Print
Ninja Creami Vanilla Ice Cream Recipe
- Total Time: 10 minutes
- Yield: 6 servings 1x
Description
This classic vanilla ice cream is creamy, smooth, and versatile, making it perfect for enjoying on its own or as a base for countless other dessert creations. Enjoy your homemade treat!
Ingredients
- 2 cups heavy cream
- 1 cup whole milk
- 3/4 cup granulated sugar
- 1 tablespoon pure vanilla extract
Instructions
- Combine Ingredients: In a mixing bowl, whisk together heavy cream, whole milk, granulated sugar, and vanilla extract until the sugar is completely dissolved.
- Chill: Pour the mixture into an ice cream pint container. Seal the container and place it in the freezer. Freeze the mixture until it is completely solid, at least 24 hours.
- Process: Once frozen, remove the container from the freezer and place it into the Ninja Creami. Use the ice cream function to process the mixture until creamy, usually about 2-3 minutes.
- Serve or Store: Serve immediately for a soft-serve texture. For a firmer texture, transfer the ice cream to an airtight container and freeze for an additional 2-4 hours.
Notes
- Ensure all ingredients are well chilled before mixing to help speed up the freezing process.
- For a richer flavor, you can substitute the vanilla extract with a vanilla bean. Split the bean lengthwise and scrape out the seeds; add both seeds and pod to the cream mixture while heating it slightly, then remove the pod before freezing.
- Prep Time: 10 minutes (plus 24 hours freezing time)
Nutrition
- Serving Size: 6 servings
- Calories: Approximately 330 calories
- Sugar: 20g
- Sodium: 50mg
- Fat: 28g
- Saturated Fat: 17g
- Carbohydrates: 21g
- Fiber: 0g
- Protein: 2g
- Cholesterol: 100mg
Keywords: Ninja Creami dessert ideas, Ninja Creami frozen treats, ninja creami recipes