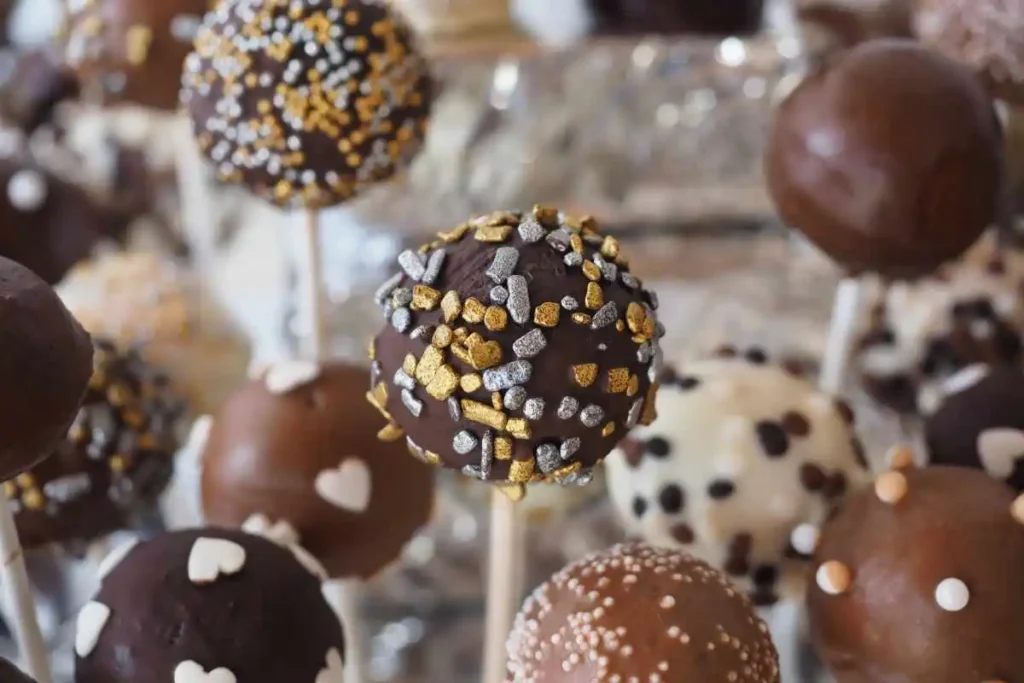
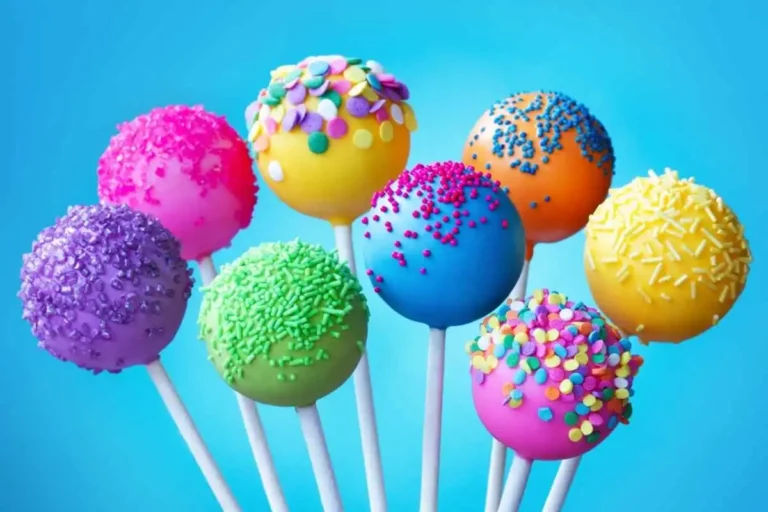
Creating cake pops is not just about mixing cake and frosting; it’s an art that combines baking, decorating, and a lot of creativity. This guide will walk you through everything you need to know about making cake pops, from the basic ingredients and equipment to decorating techniques and common pitfalls to avoid.
Table of Contents
- Introduction
- What You Will Need
- Step-by-Step Guide to Making Cake Pops
- Decorating Your Cake Pops
- Common Mistakes and Tips
- Variations of Cake Pop Recipes
- FAQs
- Conclusion
Introduction
Cake pops are a delightful treat that combine the flavor of cake with the convenience of a lollipop. Originally popularized by bakeries as a way to use leftover cake, cake pops have become a popular choice for parties, celebrations, and even as homemade gifts. These treats are versatile, customizable, and fun to make. Whether you’re a baking novice or a seasoned pro, this guide will help you master the art of making cake pops.
In this section, we will explore the origins of cake pops, discuss their popularity, and highlight their versatility for various events and celebrations. By the end of this guide, you will have all the knowledge you need to create your own delicious and aesthetically pleasing cake pops.
What You Will Need
Ingredients
Creating perfect cake pops begins with selecting the right ingredients. Here’s what you’ll need:
- Cake: You can either use a cake made from scratch or a boxed mix. Popular flavors include chocolate, vanilla, and red velvet. The choice depends on your taste preference and the occasion for which the cake pops are being made.
- Frosting: It serves as a binder for the cake crumbs. Cream cheese, buttercream, and chocolate are common choices. The amount of frosting needed can vary, but typically, a ratio of one part frosting to four parts cake works well.
- Coatings and Decorative Elements: White, milk, and dark chocolate are popular choices for coatings. For a festive touch, consider sprinkles, crushed nuts, or coconut flakes.
Equipment
Proper equipment can make the process of making cake pops smoother and more enjoyable:
- Cake Pop Sticks: These are essential for giving cake pops their classic lollipop appearance.
- Cake Pop Maker or Hands Forming: While a cake pop maker can streamline the process, shaping the cake pops by hand is also an option. This involves rolling the cake mixture into balls.
- Melting Tools for Coatings: A double boiler or a microwave-safe bowl is necessary for melting chocolate or candy melts used for coating the cake pops.
This section provides a foundation for what you’ll need to start making your own cake pops. Each element, from the type of cake to the choice of decorations, allows for customization and creativity.
Step-by-Step Guide to Making Cake Pops
Making the Cake Base
The first step in creating cake pops is to have a perfectly baked cake. Here’s how to ensure your cake base is ideal for cake pops:
- Bake the Cake: You can use a favorite recipe or a boxed cake mix. The goal is to have a cake that is moist, as it will need to crumble easily without being too dry.
- Cool the Cake: Allow the cake to cool completely after baking. This makes it easier to crumble without it becoming mushy.
- Crumble the Cake: Use your hands or a food processor to crumble the cake into fine pieces. The texture should be consistent without any large chunks.
Mixing with Frosting
Once you have crumbled your cake, it’s time to mix it with frosting to create a moldable texture:
- Measure the Frosting: Start with a small amount of frosting, as too much can make the cake pops too wet.
- Mix Thoroughly: Combine the cake crumbs and frosting until the mixture is even. It should be dense enough to hold a ball shape without falling apart.
Shaping and Prepping
With the mixture ready, you can start shaping and preparing your cake pops:
- Forming Balls: Using a small scoop or your hands, form the cake mixture into uniform balls. Aim for about one inch in diameter.
- Inserting Sticks: Dip the tip of each cake pop stick into melted chocolate or candy melt before inserting it halfway into each ball. This helps the stick hold better.
- Chilling: Place the formed balls on a baking sheet and chill in the refrigerator for at least an hour to set. This step is crucial as it prevents the cake pops from falling apart during dipping.
This process outlines the essential steps to create the base for your cake pops, ensuring they are ready for decoration and further enhancements. By following these steps, you can achieve a perfect balance of flavor and texture that forms the foundation of any good cake pop.
Decorating Your Cake Pops
Once your cake pops are chilled and firm, you can proceed to decorate them. This step not only enhances their appearance but also adds an extra layer of flavor. Here’s how you can create beautiful and delicious cake pops:
- Melting the Coating: Use a double boiler or microwave to melt chocolate or candy melts until smooth. This will be used to dip the cake pops and must be fluid enough for a smooth coat.
- Dipping Technique: To dip a cake pop, hold it by the stick and submerge it into the melted coating, ensuring the entire ball is covered. Gently tap the stick on the edge of the bowl to remove excess coating.
- Adding Decorations: Immediately after dipping, sprinkle decorations such as sprinkles, crushed candies, or nuts over the wet coating. This needs to be done before the coating sets.
Creative Presentation Ideas
- Thematic Designs: For special occasions, theme your cake pops to match. For instance, red and green sprinkles for Christmas, or orange and black for Halloween.
- Display Stands: Use styrofoam blocks or special cake pop stands to display your cake pops. This not only makes them look professional but also prevents them from smudging.
- Gift Packaging: Cake pops can be individually wrapped in clear cellophane and tied with a ribbon, making them perfect gifts or party favors.
When decorating cake pops, you can let your creativity shine. Whether you opt for a simple chocolate coating or an elaborate design, you can tailor each cake pop to fit the occasion and your personal style.
Common Mistakes and Tips
Decorating cake pops is both challenging and fun. Here are some tips to help you navigate common pitfalls:
- Avoid Overheating the Coating: This can cause the chocolate to seize. Instead, melt gently and keep at a consistent temperature.
- Don’t Rush the Chilling Step: Cake pops need to be firm enough to handle the dipping process without falling apart.
- Use the Right Coating Thickness: If the coating is too thick, it might make the cake pops heavy and cause them to fall off the sticks. Thinning the chocolate with a bit of coconut oil can help achieve a smoother consistency.
By following these decorating steps and tips, you can create visually stunning and tasty cake pops that are sure to impress.

Common Mistakes and Tips
Making cake pops can sometimes be tricky, but being aware of common mistakes can help you avoid them. Here are some tips to ensure your cake pops turn out perfectly every time:
Common Mistakes
- Cake Too Dry or Too Moist: The texture of the cake is crucial. If it’s too dry, the pops will crumble; if it’s too moist, they may not hold their shape. Adjust the amount of frosting accordingly to achieve the right balance.
- Coating Cracks: This often happens if the cake pops are too cold when dipped into the warm coating. Allow the chilled cake pops to sit at room temperature for a few minutes before dipping.
- Falling Off the Stick: This could be due to several reasons, such as not inserting the stick properly, the cake mixture being too loose, or the coating being too thick. Ensure the stick is dipped in coating before insertion and the cake mixture is firm enough.
Tips for Perfect Cake Pops
- Test the Mixture: Before rolling out all your cake pops, test one in the coating to ensure the consistency is right.
- Work in Batches: Keep most of the cake pops in the fridge while you work with a few at a time to ensure they stay firm during the dipping process.
- Quick Fixes: If the coating starts to set or thicken, gently reheat it while stirring constantly to maintain a smooth consistency.
Implementing these practices will help you navigate common hurdles and perfect the art of making cake pops.
Variations of Cake Pop Recipes
Exploring different variations can keep your cake pop making exciting and diverse. Here are some ideas to inspire your creations:
Flavor Variations
- Chocolate Lovers: Mix dark chocolate cake with chocolate ganache and dip in milk chocolate.
- Birthday Cake: Use a funfetti cake mix and vanilla frosting, then dip in white chocolate and top with colorful sprinkles.
- Red Velvet Romance: Combine red velvet cake with cream cheese frosting and coat with white chocolate.
Dietary Adaptations
- Gluten-Free: Use a gluten-free cake mix and ensure all other ingredients are certified gluten-free.
- Vegan Options: Opt for vegan cake recipes and dairy-free chocolate. Use plant-based creams for the frosting.
Seasonal and Festive Variations
- Halloween Spooks: Create pumpkin spice cake pops with orange-colored coatings and draw spooky faces with edible markers.
- Christmas Delights: Make peppermint chocolate cake pops dipped in white chocolate and sprinkled with crushed candy canes.
By experimenting with these variations, you can cater to different tastes and occasions, making your cake pops a hit no matter the audience or event.
FAQs
When making cake pops, you might encounter several questions, particularly if you are new to this delightful treat. Consequently, here are answers to some commonly asked questions based on the “People Also Ask” section:
What is the trick to making cake pops?
The trick to making perfect cake pops involves several key steps:
- Consistency: Achieving the right consistency is crucial. The cake mixture should be moist enough to hold together when shaped but not so wet that it becomes gooey or falls off the stick.
- Chilling: Proper chilling is essential. Chill the cake balls before dipping them in the coating to ensure they don’t fall apart during the dipping process.
- Smooth Coating: Heat the coating to the right temperature — it should be warm and melted but not too hot, which can cause the cake to soften too much, leading to slips or drips.
- Decorating Quickly: After dipping the cake pops in the coating, add any decorative elements like sprinkles or other toppings before the coating sets to ensure they stick properly.
What are cake pops made of?
Cake pops are made of three basic components:
- Cake: The base is usually made from fully baked cake — any flavor works. The cake is crumbled into fine crumbs.
- Frosting: Frosting is mixed with the cake crumbs to bind them together. The amount of frosting needed can vary based on the moistness of the cake.
- Coating and Decorations: After rolling into balls and placing on sticks, you dip the cake pops in a chocolate or candy melt coating and can decorate them with sprinkles, colored sugars, or other edible decorations.
What are Starbucks cake pops made of?
Starbucks standardizes cake pops for mass production, though they have a composition similar to homemade cake pops:
- Cake: The cake used is typically a standard flavor like chocolate, vanilla, or seasonal varieties like peppermint brownie.
- Frosting: A frosting that complements the cake flavor is mixed in.
- Coating: Candy melts, flavored and colored to match the theme or flavor profile (e.g., pink for a birthday cake flavor), coat them.
- Decorations: They often include a simple decoration like a sprinkle of nonpareils or a drizzle of a contrasting candy melt.
How much is 1 cake pop?
The cost of a single cake pop can vary depending on where you purchase it or the cost of ingredients if you are making them at home:
- Retail Prices: At places like Starbucks, a single cake pop might cost between $2 to $4, depending on the location and the specific type of cake pop.
- Homemade Costs: When making cake pops at home, the cost per pop can be much lower, often under $1 per pop, depending on the ingredients used. Bulk buying and using homemade ingredients can reduce the cost further.
Conclusion
Congratulations! You are now equipped with the comprehensive knowledge to create delicious and attractive cake pops. From selecting the right ingredients and equipment to mastering the techniques of mixing, shaping, decorating, and addressing common issues, you have everything you need to succeed. Remember, the key to perfect cake pops is practice and creativity. Don’t be afraid to experiment with flavors and designs, and most importantly, have fun with the process!
Print
Cake Pop Recipe
- Total Time: 2 hours
- Yield: 24 cake pops 1x
- Diet: Vegetarian
Description
This recipe provides a basic framework for making cake pops. Feel free to customize the flavors and decorations to match your event or preferences. Enjoy crafting these tasty and adorable treats!
Ingredients
- 1 (18.25 oz) package cake mix (any flavor)
- 3/4 cup ready-made frosting (matching flavor)
- 400 grams candy melts or chocolate (for coating)
- Sprinkles or other decorations (optional)
- 24 cake pop sticks
Instructions
- Bake the Cake:
- Prepare the cake mix according to the package instructions.
- Bake in a 9×13 inch pan, cool completely on a wire rack.
- Crumble the Cake:
- Once cooled, crumble the cake thoroughly in a large bowl. Ensure there are no large chunks.
- Mix with Frosting:
- Add the frosting to the crumbled cake. Mix with a spoon or your hands until the mixture is uniform and can hold a ball shape.
- Form the Cake Balls:
- Roll the mixture into balls about the size of a golf ball.
- Insert a stick into each ball and place them on a baking sheet lined with parchment paper.
- Freeze for about 20-30 minutes, or refrigerate for a few hours until firm.
- Coat the Cake Pops:
- Melt the candy melts in the microwave per the package instructions, stirring until smooth.
- Dip each cake pop into the melted candy, twirl to remove excess, and tap gently if needed.
- Decorate with sprinkles or other toppings before the coating sets.
- Set and Serve:
- Poke the cake pop sticks into a styrofoam block to let them stand up while the coating sets.
- Once set, cake pops are ready to serve or can be wrapped up as gifts.
Notes
- Ensure the cake balls are firm before dipping; otherwise, they may fall off the stick.
- If the coating is too thick, add a bit of coconut oil or vegetable shortening to thin it.
- Store cake pops in a cool, dry place to avoid melting.
- Prep Time: 2 hours (including chilling)
- Category: Desserts
- Method: Baking
- Cuisine: American
Nutrition
- Serving Size: 24 cake pops
- Calories: Approximately 180 calories per cake pop (varies with cake and frosting types used).
- Sugar: 18g
- Sodium: 120mg
- Fat: 8g
- Saturated Fat: 4g
- Trans Fat: 0g
- Carbohydrates: 25g
- Fiber: 0g
- Protein: 2g
- Cholesterol: 5mg
Keywords: cake pop instructions, making cake pops, cake pop guide
