
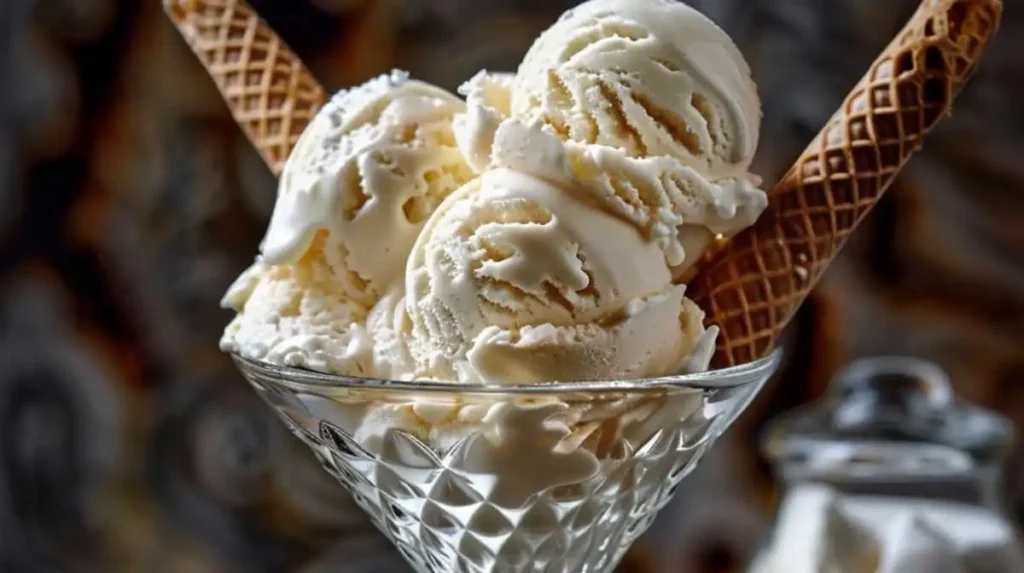
Welcome to the ultimate guide to crafting the perfect vanilla ice cream using the Ninja Creami. Whether you’re a seasoned ice cream aficionado or a curious newbie ready to dip your spoon into the world of homemade desserts, this guide is tailored to help you achieve creamy, dreamy success.
The Ninja Creami has revolutionized the home dessert scene with its innovative technology that allows anyone to transform everyday ingredients into a gourmet frozen treat. Vanilla ice cream, a timeless favorite, offers the perfect canvas to showcase what the Ninja Creami can do. This guide not only walks you through the essential steps but also dives deep into the nuances that make vanilla ice cream with the Ninja Creami a cut above the rest.
In this comprehensive exploration, we’ll cover everything from the basics of the Ninja Creami vanilla ice cream recipe to expert tips for customizing your flavor. Get ready to churn out delicious results that will change the way you think about homemade ice cream.
Let’s get started with understanding the foundational elements that contribute to making exceptional ice cream with the Ninja Creami.
Understanding the Ninja Creami Vanilla Ice Cream Recipe
What Makes the Ninja Creami Ideal for Ice Cream Making?
The Ninja Creami stands out in the kitchen appliance market for its versatility and innovative approach to frozen desserts. Unlike traditional ice cream makers that require pre-freezing bowls and often cumbersome churning processes, the Ninja Creami simplifies everything with its all-in-one design. Here’s why it’s becoming a favorite among dessert lovers:
- Automated Processes: The device automates the freezing and churning processes, ensuring consistent textures without the need for manual intervention.
- Customizable Consistency: Whether you prefer your ice cream soft and creamy or firm and scoopable, the Ninja Creami offers settings to customize the texture to your liking.
- Speed and Convenience: From start to finish, the Ninja Creami can produce ready-to-eat ice cream in a fraction of the time it takes traditional machines, making it ideal for those spur-of-the-moment dessert cravings.
With these features, the Ninja Creami not only enhances the ice cream-making experience but also ensures that even novices can produce professional-quality ice cream at home.
Key Ingredients for Ninja Creami Vanilla Ice Cream
Creating the perfect vanilla ice cream starts with the right ingredients. Here’s what you’ll need for a basic but delicious Ninja Creami vanilla ice cream:
- Heavy Cream and Milk: The base of any good ice cream, heavy cream, and milk are crucial for achieving a rich, creamy texture. The fat content in heavy cream provides smoothness, while milk balances the mixture.
- Sugar: Essential for sweetness and also plays a role in the texture.
- Vanilla Extract: For authentic flavor, pure vanilla extract is a must. It’s worth opting for high-quality vanilla to elevate your ice cream.
- Egg Yolks (optional): While not necessary, egg yolks can be added for extra richness and to help stabilize the mixture, resulting in a creamier texture.
These ingredients are mixed into a uniform base, which is then poured into the Ninja Creami pint to be frozen and churned.
Equipment and Tools Required
To make vanilla ice cream with the Ninja Creami, you’ll primarily need the Ninja Creami itself. However, a few additional kitchen tools can make the process even smoother:
- Measuring Cups and Spoons: Crucial for precise ingredient measurements.
- Mixing Bowl: Needed for combining the ingredients before they go into the Creami.
- Whisk or Electric Mixer: Useful for ensuring that the sugar dissolves completely into the base and for incorporating the egg yolks thoroughly, if using.
- Spatula: Helps in transferring the ice cream mixture into the Creami pint without any wastage.
- Ice Cream Scoop: For serving your finished product perfectly.
Equipped with your Ninja Creami and these tools, you’re ready to move on to the actual process of making the ice cream, which we’ll cover in the next section.
Step-by-Step Guide to Making Vanilla Ice Cream in Your Ninja Creami
Preparing Your Ninja Creami
Before diving into the actual ice cream making, it’s important to set up your Ninja Creami properly. This ensures that the machine operates efficiently and your ice cream turns out as expected:
- Read the Manual: Familiarize yourself with the machine’s components and capabilities.
- Clean and Assemble: Ensure that the machine and its parts are clean and correctly assembled. This includes the pint, blade assembly, and the outer bowl.
- Pre-Chill the Pint: For best results, pre-chill the Creami pint in the freezer for at least 24 hours before you plan to make ice cream. This helps in faster and more even freezing.
Mixing the Ingredients
Creating a smooth, well-balanced mixture is key to the perfect consistency of your ice cream:
- Combine Liquid Ingredients: In a large bowl, mix the heavy cream, milk, and vanilla extract. If you are using egg yolks, whisk them with a small amount of the milk and sugar separately to temper them before adding to the main mixture.
- Add Sugar: Gradually add sugar while continuously whisking to ensure it completely dissolves. This prevents gritty textures in your ice cream.
- Cool the Mixture: Chill the mixture in the refrigerator for at least an hour or until it’s completely cold. This step is crucial for achieving a creamy texture when frozen.
The Freezing Process
Now comes the exciting part—turning your creamy mixture into ice cream using the Ninja Creami:
- Pour Into the Pint: Transfer your chilled mixture into the pre-chilled Creami pint. Fill only up to the fill line to avoid overflow during the freezing process.
- Start the Ninja Creami: Place the pint in the machine, secure the lid, and select the ‘Ice Cream’ function. The Creami will start its magic, freezing and churning simultaneously.
- Monitor the Process: The Creami typically takes about 2-5 minutes to complete the cycle. You can check the consistency once the cycle ends. If it’s too soft for your liking, you can run another cycle.
Finalizing Your Ice Cream
After the Ninja Creami has done its initial freezing and churning, a few final touches can make your vanilla ice cream even more delightful:
- Extra Creaminess: For a smoother texture, use the ‘Re-spin’ feature to churn the ice cream a bit more. This can help break any ice crystals that might have formed.
- Serving: If you prefer softer ice cream, serve it immediately. For firmer ice cream, transfer it to an airtight container and freeze for another 1-2 hours.
- Cleanup: Clean the Creami pint and other parts according to the manufacturer’s instructions to keep everything ready for your next batch.
With these detailed steps, you’re well on your way to enjoying delicious, homemade vanilla ice cream. Adjust the process based on your texture preferences and the specific features of your Ninja Creami model.
Flavor Variations and Creative Add-Ins
Once you’ve mastered the basic Ninja Creami vanilla ice cream recipe, experimenting with different flavors and add-ins can turn your homemade ice cream into a gourmet treat. Here’s how you can spice up your batches with simple, yet effective variations:
Classic Vanilla Bean Upgrade
If you’re a purist who loves the rich, natural flavor of vanilla, enhancing your ice cream with real vanilla beans can make a significant difference:
- Split the Bean: Use a sharp knife to split a vanilla bean pod longitudinally to expose the tiny seeds inside.
- Infuse the Cream: Add the split pod and scraped seeds to the cream and milk mixture while heating it slightly (do not boil). This helps release the flavorful oils and compounds.
- Chill and Strain: Allow the mixture to cool and then refrigerate it with the bean pod inside for a few hours, preferably overnight, to deepen the flavor. Remove the pod before churning.
This method intensifies the vanilla flavor, giving your ice cream a gourmet twist that’s hard to resist.
Mix-Ins and Toppings
For those who love a bit of texture and variety in their ice cream, here are some exciting mix-ins and topping ideas:
- Chocolate Chips or Chunks: Add these at the final minute of churning to maintain their crunch.
- Fresh Fruits: Berries, diced mango, or peaches can add a refreshing twist. Make sure fruits are well-drained and possibly pre-frozen to avoid ice crystals.
- Nuts and Cookies: Crushed nuts or cookie pieces provide a delightful crunch. Add these in the last stages of churning or sprinkle on top when serving.
- Caramel or Chocolate Sauce: Swirl in these sauces after the ice cream is churned for a marbled effect.
By experimenting with these add-ins, you can customize each batch of your Ninja Creami ice cream to suit your taste or impress your guests with unique combinations.
Troubleshooting Common Issues
Even with the best recipes and techniques, sometimes homemade ice cream doesn’t turn out as expected.
Here are some frequent problems and their solutions:
Dealing with Ice Cream Consistency Problems
- Too Soft: If your ice cream isn’t firming up, make sure the pint was fully pre-chilled and the ice cream base was cold enough before churning. Consider running an additional freeze cycle.
- Too Hard: Ice cream that’s too hard to scoop usually indicates excessive freezing. Allow it to sit at room temperature for a few minutes before serving or adjust the settings to reduce the freezing time.
Flavor and Texture Improvements
- Lack of Flavor: Boost flavor by increasing the quantity of vanilla extract or infusing the mixture with a vanilla pod as previously described.
- Icy Texture: This can be caused by too much water in your base. Ensure your fruit additions are pre-frozen or use less milk in the mixture.
By addressing these issues, you can ensure that each batch of ice cream is as perfect as possible.
Serving and Storage Tips for Ninja Creami Ice Cream
Making great ice cream with your Ninja Creami is only part of the fun—serving and storing it properly can make a big difference in your overall enjoyment. Here are some tips to help you serve and store your homemade ice cream like a pro.
Best Practices for Serving
When it comes time to serve your homemade vanilla ice cream, a few tips can help ensure it’s enjoyed at its best:
- Temperature Timing: Homemade ice cream can sometimes be firmer than commercial varieties. Allow it to sit at room temperature for a few minutes before scooping to soften slightly.
- Proper Scooping: Use a warmed ice cream scoop (run it under hot water) to glide through the ice cream more easily, creating perfect scoops every time.
- Presentation: Serve your vanilla ice cream in chilled bowls or cones. You can also drizzle it with sauces, sprinkle with toppings, or pair it with desserts like warm brownies or pie to elevate the experience.
Storing Homemade Ice Cream
The right storage techniques can extend the freshness and texture of your ice cream:
- Airtight Containers: Transfer any leftover ice cream into an airtight container. This helps prevent ice crystals from forming and keeps the ice cream creamy.
- Press Plastic Wrap: To further protect against freezer burn, press a piece of plastic wrap directly onto the surface of the ice cream before sealing the container.
- Optimal Temperature: Keep your freezer at a constant temperature, ideally around 0°F (-18°C). Fluctuations can cause the ice cream to soften and refreeze, leading to a grainy texture.
By following these serving and storage tips, you’ll maximize the life and quality of your homemade ice cream, ensuring it remains delicious until the last scoop.
Conclusion
Making vanilla ice cream with the Ninja Creami is not just about enjoying a sweet treat; it’s about unleashing your culinary creativity and enjoying the process. Whether you stick to the classic recipe or venture into variations with exciting mix-ins and flavors, the Ninja Creami makes it easy and fun.
We hope this guide has provided you with the knowledge and confidence to start making your own delicious ice cream at home. Remember, the key to perfect ice cream is experimentation and adjustment based on your tastes and the performance of your specific Ninja Creami model.
Now that you’re equipped with the know-how, why not try making your first batch of Ninja Creami vanilla ice cream today? Share your experiences, tips, or any delicious variations you create in the comments below, or on social media. We love hearing from fellow ice cream enthusiasts and seeing what creative flavors you come up with!
Frequently Asked Questions :
Q1: What is the best setting on the Ninja Creami for making creamy ice cream?
A1: For the creamiest texture, use the “Ice Cream” setting on your Ninja Creami. If you find the consistency too soft or too hard after the initial cycle, you can adjust by using the “Re-spin” feature to achieve the perfect texture.
Q2: How can I prevent ice crystals from forming in my ice cream?
A2: To minimize ice crystal formation, ensure that your ice cream base is thoroughly chilled before pouring it into the Ninja Creami pint. Also, storing the ice cream in an airtight container with a piece of plastic wrap pressed directly onto the surface before sealing can help keep it smooth and creamy.
Q3: Can I use the Ninja Creami to make other types of frozen desserts?
A3: Absolutely! The Ninja Creami is versatile and can be used to make a variety of frozen treats, including sorbets, gelatos, and frozen yogurt. Each dessert type has a specific setting on the device to ensure optimal results.
Q4: What are some must-try flavor combinations for Ninja Creami ice cream?
A4: Beyond classic vanilla, consider experimenting with flavors like Chocolate Peanut Butter, Strawberry Basil, or Mango Chili. For a festive twist, try Peppermint with Chocolate Chips or Pumpkin Spice in the fall.
Q5: How do I clean and maintain my Ninja Creami?
A5: After each use, disassemble the removable parts of your Ninja Creami and wash them with warm, soapy water. Avoid using abrasive cleaners or tools that could damage the surfaces. Make sure all components are completely dry before you reassemble and store them.
Q6: Can I make ice cream with alternative milks in the Ninja Creami?
A6: Yes, the Ninja Creami works well with alternative milks such as almond milk, coconut milk, or oat milk. However, the texture might be slightly different due to the lower fat content compared to traditional dairy. For richer results, consider blending these milks with coconut cream.
Q7: How long does it take to freeze ice cream in the Ninja Creami?
A7: The Ninja Creami typically completes an ice cream cycle in about 2-5 minutes. However, if additional firmness is desired, you can transfer the ice cream to a freezer-safe container and freeze it for another 1-2 hours.
Print
Ninja Creami Vanilla Ice Cream Recipe
- Total Time: About 2 hours 15 minutes
- Yield: This recipe makes approximately 1 quart of ice cream, serving 8 people (1/2 cup serving size).
Description
This creamy and classic vanilla ice cream is perfect for any occasion, whether it’s a family gathering, a summer treat, or a cozy dessert at home. Enjoy your Ninja Creami-made ice cream with your favorite toppings or simply on its own!
Ingredients
- 2 cups heavy cream
- 1 cup whole milk
- 3/4 cup granulated sugar
- 2 teaspoons pure vanilla extract
- Pinch of salt
Instructions
- Mix Ingredients: In a large mixing bowl, combine the heavy cream, whole milk, sugar, vanilla extract, and a pinch of salt. Whisk together until the sugar is completely dissolved.
- Chill Mixture: Transfer the mixture to an airtight container and refrigerate for at least 2 hours, or overnight if possible, to ensure it is thoroughly chilled.
- Prepare Ninja Creami: Remove the chilled mixture from the fridge and pour it into the Ninja Creami pint container. Make sure not to fill the container past the maximum fill line.
- Start the Ninja Creami: Secure the lid of the Ninja Creami and place the pint container inside the machine. Select the ‘Ice Cream’ function and start the machine.
- Process and Serve: Once the cycle is complete, check the consistency of the ice cream. If needed, run a ‘Re-spin’ cycle for a creamier texture. Serve immediately for soft serve consistency or transfer to an airtight container and freeze for 2-3 hours for a firmer texture.
Notes
- For an extra rich flavor, you can substitute 1 vanilla bean, split and scraped, for the vanilla extract. Add it to the cream and milk when you heat them, then remove the bean before chilling.
- Make sure your Ninja Creami pint and blade assembly are clean and dry before use to prevent ice crystallization.
- Prep Time: 10 minutes
- Cook Time: 2 hours (or overnight)
Nutrition
- Serving Size: This recipe makes approximately 1 quart of ice cream, serving 8 people (1/2 cup serving size).
- Calories: Approximately 280 calories per serving (1/2 cup).
- Sugar: 17g
- Sodium: 55mg
- Fat: 24g
- Saturated Fat: 15g
- Trans Fat: 1g
- Carbohydrates: 17g
- Fiber: 0g
- Protein: 2g
- Cholesterol: 90mg
Keywords: Ninja Creami ice cream, homemade vanilla ice cream, easy vanilla ice cream recipe